Labels

Resepi (75) Memories (40) My Stuff (38) Sembang-Sembang (38) Baby (36) Love (34) Rawatan Kesuburan (32) makan-makan (32) Vacation (17) Wedding (11) Cake (10) Dessert (9) My PEt (9) Kueh (7) Sayur (7) Roti (6) Ayam (5) Daging (5) Ikan (5) Pasta (5) Biskut (4) Dapur (4) Giveaway H.O.K (4) Pastry (4) Potato (4) BBT (3) BantaL Busuk (3) JusT Sew iT (3) Mesin Jahit (3) Nasi (3) Sambal (3) Sotong (3) Tak mo gemox (3) Tutorial (3) WordleSS (3) perangai preggy (3) Diet (2) Layazz (2) Minum Petang (2) Nasi Ayam (2) Udang (2) Ulam (2) nasi kandar (2) tilam dan bantal (2) Acar (1) Cendawan (1) Doa Dhuha (1) Giveaway Contest (1) HSG (1) Jem (1) Kerepek (1) Lontong (1) Luahan rasa (1) Masakan Arab (1) Meehoon (1) Movie (1) Petai (1) Telur (1) Tempe (1) WTS PillOW (1) Western (1) minuman (1) semangat (1) ww (1) zikir (1)
Showing posts with label Tutorial. Show all posts

Wednesday, June 1, 2011

Tutorial -Jahitan Insang Pari - untuk jahitan tepi

KHAS unTuk Cik Jismin..Harap ko boleh jahit lepas nie..wokeh..gudluk!


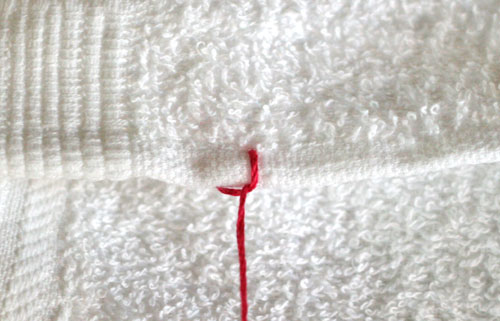
Jahitan Insang Pari - untuk jahitan tepi

Mula2 susup simpulan benang pd lapisan kedua felt.

Dan matikan seperti jahitan diatas.

Mulakan dgn mencucuk benang ke atas n masuk dlm loop.

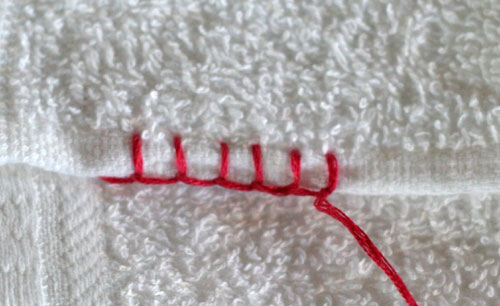
Buat byk2. Jahitan ni nmpk kemas seperti 1 garisan pada pandangan sisi.

Pandangan atas: seperti pagar n tiang2...

JAHITAN2 FELT - PATCH
Tutorial ini khas untuk asas jahitan untuk wat patch (dlm bhs pasar dia nk cantum corak2 pd felt). Saya biasa gunakan 2 jenis jahitan iaitu jelujur biasa dan jelujur sembat.


Nak tunjuk cara-cara jelujur sembat je..sbb jelujur biasa org dh tahu.

Masukkan benang dr bwh.

Mcm ni...ulang2 byk2 jd la spt gambo kt atas tu..

Mainyak sonang wooo....


cdt to aidascreation

Tutorial - Blanket Stitch

Blanket Stitch (Source: craftydaisies)


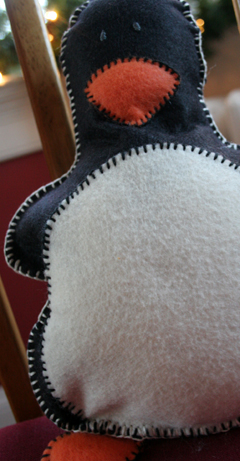
This is a great stitch to border items such as blankets (go figure), shirt collars, and also joining items together. The blanket stitch was the only stitch used to piece together this felt penguin.

finished-penguin2.jpg

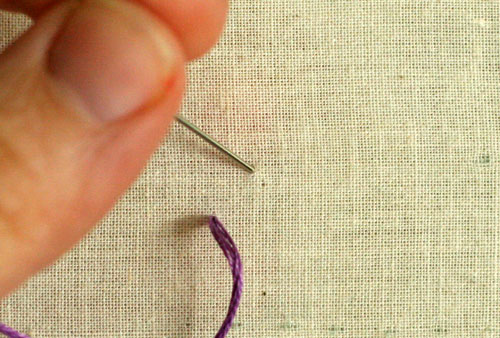
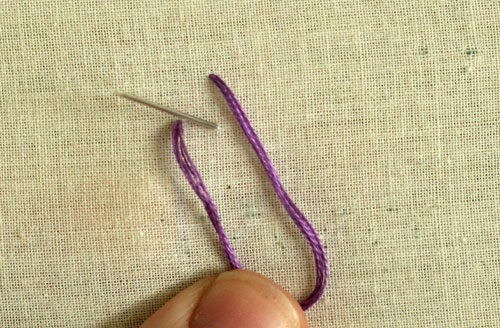
You’ll begin by bringing your needle up at the base of your work, or where you’ll need it to be lined up (at A). Next, you’ll bring your needle down at B, diagonal to point A, and then up at C, which will be beside point A (about 1/4″ away). You’ll need to have the thread looped underneath your needle when you come up at C, or else this stitch won’t work.
embroidery6.jpg

embroidery7.jpg
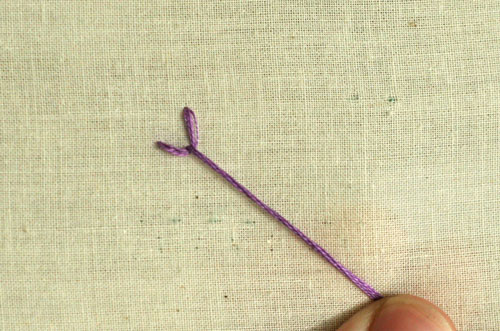
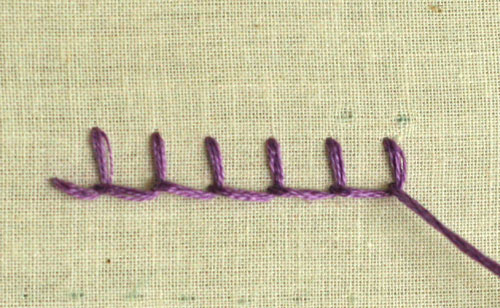
Then you’ll pull the thread taut and you have a backwards “L”.
embroidery8.jpg
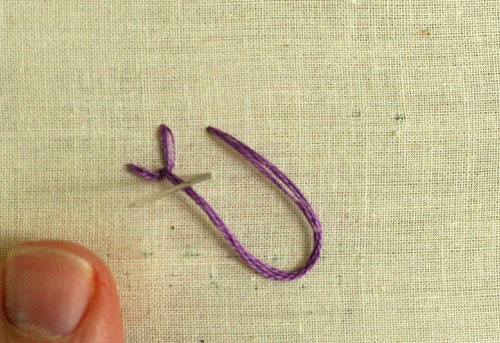
You’ll do this over and over until you get to the end of your edge or completed the length that you need.
embroidery9.jpg

embroidery10.jpg
When you’re done, you’ll take the needle through on the opposite side of where you came up for the last time, planting that stitch and leaving your thread behind your work.

embroidery11.jpg

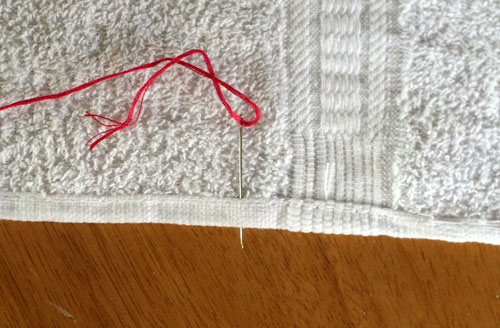
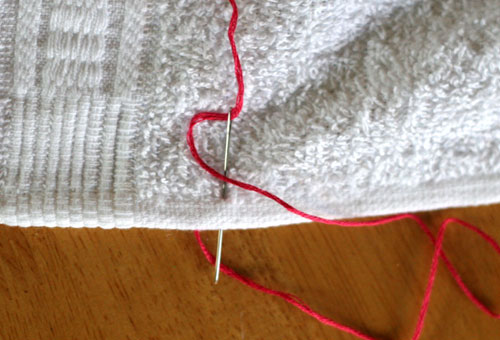
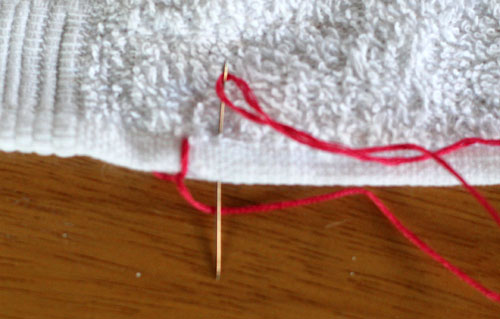
When doing this stitch on the edge of a garment or piece of fabric, you’ll execute in the same fashion, starting on the backside of the fabric. Take the needle and go down through the hem vertically (at A), turn your fabric over and go down at B (diagonal to A) and through the hem vertically, like you did at A.
embroidery19.jpg

embroidery20.jpg
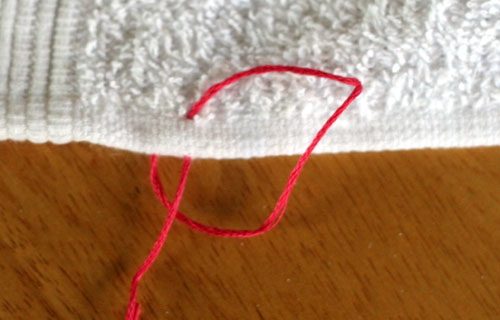
Make sure that your thread is looped behind/underneath the needle as you pull the thread taut.
embroidery21.jpg

embroidery22.jpg

Continue until you reach the end, planting your stitch when you’re done.
embroidery23.jpg

embroidery24.jpg

Selamat MencubA!!

Tutorial - Felt Covered Hair Clip

Ini cara-cara nak buat hairclip yang paling simple dan senang. Aku nak share dengan uolzz...boleh buat sendiri di rumah yer..


bahan yang diperlukan:-
Hair Clip
kain felt (any color u like) - boleh di beli di sini, sini, sini
Benang dan jarum
hiasan (butang atau bunga)


cara:-
sumbgan gambar dari crazyartzone
dan inilah hasilnya...

Cara jahitan boleh tengok di sini.


jom la cuba buat. sangat senang. 


Selamat Mencuba!!

Followers